LDAP Authentication

With the release of MachForm v4.3, we’ve added a new feature to let your MachForm to authenticate against LDAP server.

What is LDAP?

If you’re not familiar with LDAP already, then most likely you won’t need to use it. LDAP (Lightweight Directory Access Protocol) is mostly used by medium-to-large organizations to provide single sign-on functionality across different applications.

How does MachForm work with LDAP?

Once enabled, all logins will be authenticated against LDAP server. Local MachForm user will be created automatically (if no existing machform user found) for authenticated LDAP login.

Any operation to change login credentials from within MachForm will be disabled and you’ll be able to control it from your LDAP server.

However, to assign custom privileges/permissions, you still need to use MachForm panel.

How to enable?

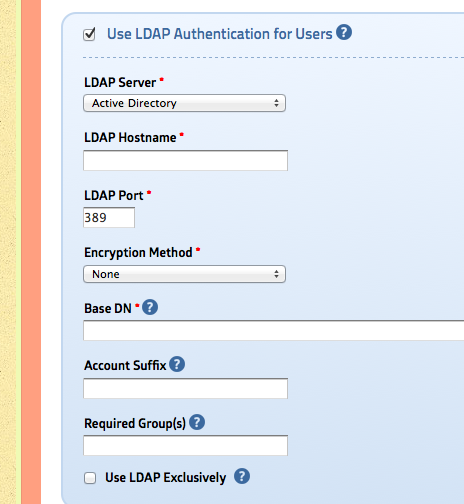
Simply go to Settings page and turn on “Use LDAP Authentication for Users” option. You’ll be prompted to enter your LDAP server details there.

Supported LDAP Server

MachForm has been tested to work with Active Directory, OpenLDAP and ApacheDS. It should also working with other LDAP servers that support LDAP V3.

Requirement

This functionality require PHP LDAP extension to be enabled on your server.

Availability

LDAP Authentication is only available within MachForm Unlimited license.

MachForm 4.2.3 Security Release

MachForm 4.2.3 is now available for downloads on Members Area. This is a critical security release for previous versions (v3.0 or newer) and we STRONGLY encourage you to update your machform immediately.

Detailed information regarding the security issue will be published later. This is necessary, so that other machform users will have enough time to update their installation.

We appreciated the responsible disclosure of this issue directly to MachForm team, reported by Amine Taouirsa (S2 Groupo).

How to Update

This update is free for all V4 owners.
As mentioned above, you can download it on Members Area.

If you are currently using v4.x or v3.x, follow this upgrade instruction:
Upgrading MachForm 3.x/4.x to 4.2

If you are still using v2.x, follow this upgrade instruction:
Upgrading MachForm 2.x to 4.2

Note for V3 Users

If you, for any reason, can’t update your machform to v4.2.3, we’ve prepared v3.5.4 containing the security fix. You can download it from members area.

Update Support

We will provide full technical support for all affected MachForm users (v3.0 or above), regardless of your support contract period. Please contact us directly if you need further assistance with the update.

If you have customized MachForm, we can help you with the customized update as well.

We recognize how much trust you place in us and we take this responsibility very seriously. We’re sorry for this issue and we’ll help you as hard as we can to update and secure your machform.

MachForm 4.2 Released

MachForm version 4.2 is now available for downloads on Members Area!.

This update added several new features, improvements and bugfixes. We recommend you to update due to improved security protections within this release.

Here’s what’s new in MachForm 4.2

[gs_4a]

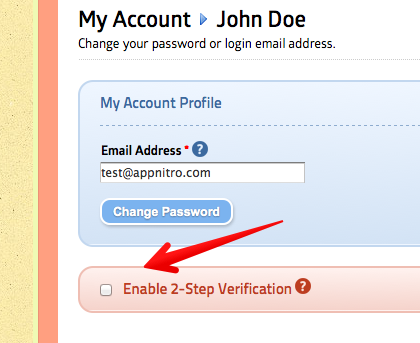
2-Step Verification

Secure user login
using six-digit security code

[/gs_4a]

[gs_4z]

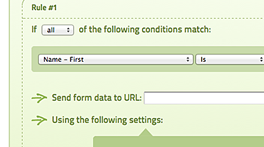
Logic for Webhook

Create multiple rules
to send webhook.

[/gs_4z]
[gs_4a]

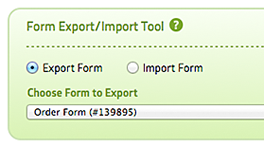
Form Export / Import

Easily copy your form design
and settings to another MachForm

[/gs_4a][gs_4z]

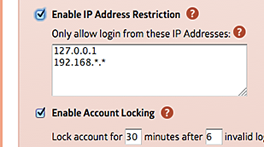
Account Security

Automatic account locking
and IP address restriction.

[/gs_4z]

[hr]

[listarrow]

[/listarrow]

Bugfixes and Improvements

[listarrow]

  • Prevent accidental double submission on all forms
  • Allow user to continue editing the form after saving it
  • Auto populate choice/select options on logic builder page
  • Allow any logic notifications to be executed immediately, regardless of “delay notification until paid” option
  • Added debugging message when saving the form
  • Added option to display series name on stacked chart
  • Support for detailed template variables for date fields
  • Support for Bahasa Indonesia
  • On PayPal variable recurring payments, the item names will be displayed into the payment description
  • Added indexes to logic tables to speed up loading on form with huge amount of logic
  • Prompt user to confirm when leaving the form builder page without saving
  • Added option to sort the forms on the form manager, ascending or descending
  • Getting payment URL for unpaid entry is now supported for all merchants
  • Bugfix: Google reCAPTCHA being cutoff when the form is embedded using javascript code
  • Bugfix: Create Date is not being populated correctly when form having review page
  • Bugfix: Empty space is not considered as valid input anymore
  • Bugfix: On a page where no conditional fields exist, jQuery ready code is still being produced
  • Bugfix: Incorrect ‘unique’ checking on empty-non-required fields
  • Bugfix: Incorrect SSL suffix with the theme
  • Bugfix: Total payment aren’t aligned properly to the right when the fields are having guidelines
  • Bugfix: On PayPal recurring payments with trial period, the subscription id is not being recorded properly
  • Bugfix: Norwegian currency is not being displayed correctly
  • Bugfix: Edit page is loading non-existent machform.gif
  • Bugfix: Matrix field choices are not being displayed properly on Android browsers
  • Bugfix: Field intentionally hidden using “hidden” class should be included within total payments and any hidden fields due to logic shouldn’t be included
  • Bugfix: Website field is not being validated properly when hidden and left empty
  • Bugfix: When using fixed coupon code on Stripe, PayPal REST, Braintree and Authorize.net, the discount amount is not being calculated correctly
  • Bugfix: When form review enabled on payment-enabled forms, when the value of payment is zero it doesn’t skip the payment page
  • Bugfix: Email with quote is causing error with the mailer library
  • Bugfix: Deleting draft checkbox field is causing save error
  • Bugfix: On some server, depends on PHP configuration, session id is having length more than 100 characters and causing several issue
  • Bugfix: Currency can’t be saved properly when braintree selected
  • Bugfix: On servers running PHP 5.3.9 or above, max_input_vars default setting is causing issue when building large logic or importing bulk options
  • Bugfix: On payment settings page, when the original coupon code field was deleted and the new one being added, the new coupon code field won’t get saved
  • Bugfix: When a checkbox is selected by default and the user submitted unchecked checkbox, it will always being checked within edit entry page
  • Bugfix: Bulk insert choices into choice/checkbox field that only have 1-2 options won’t work
  • Bugfix: The value ’12:00 AM’ is not being recorded properly into the Time field
  • Bugfix: Default value shouldn’t be loaded during edit entry if the field is not admin only
  • Bugfix: Coupon code still being checked even though payment has been disabled
  • Bugfix: Widgets on report page when loaded through HTTPS is not using HTTPS links correctly
  • Bugfix: When a coupon code field is being deleted, discount should be turned off on the payment settings page
  • Bugfix: When a form has a fixed-amount payment setting and any field within the form is being deleted, it will incorrectly disable the payment
  • Bugfix: Filtering error when the field is having multiple choice with ‘other’ field
  • Bugfix: Clicking empty page break is generating javascript error message within the console
  • Bugfix: When a form being embedded and the user resized a text area field, the height of the iframe is not being recalculated

[/listarrow]

How to Update

This update is FREE for all V4 owners.
As mentioned above, you can download it on Members Area.

If you are currently using v4.x or v3.x, follow this upgrade instruction:
Upgrading MachForm 3.x/4.x to 4.2

If you are still using v2.x, follow this upgrade instruction:
Upgrading MachForm 2.x to 4.2

Enjoy!! 🙂

2-Step Verification for Login

With the release of MachForm version 4.2, we’ve improved many security aspects of MachForm. One of the major improvement is 2-Step Verification for MachForm Panel.

What is 2-Step Verification?

2-Step verification is an optional but highly recommended security feature that adds an extra layer of protection to your MachForm accounts.

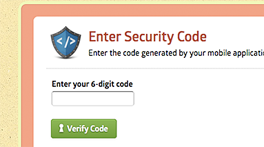
Once enabled, MachForm will require a six-digit security code (generated by TOTP authenticator mobile app) in addition to the standard password whenever users sign in to MachForm panel.

How to Enable?

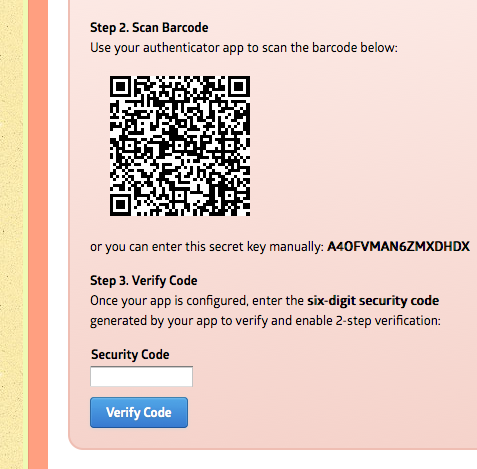
You can enable this new feature by clicking My Account on your MachForm panel and then turn on Enable 2-Step Verification.

You’ll be shown your secret key and its QR code, which you can scan into your 2-step verification app. Install one of these apps (see list below), scan the QR code shown in the MachForm Panel, and then use the app to generate a secure token every time you log in.

Supported Mobile Apps

Several mobile apps are available that will generate a unique time-sensitive security code you can use to finish signing in to your MachForm account. Any app that supports the Time-based One-Time Password (TOTP) protocol should work, including the following:

[listarrow]

[/listarrow]

2-Step verification drastically improves the protection of your account by requiring not just something you know (your email and password), but also something you have (your mobile device).

Enforce 2-Step Verification on Users

By default, 2-Step Verification is an optional feature that can be enabled/disabled personally by every user. However, Administrator can also enable the option to enforce 2-Step Verification on all users. So that all users will be required to use 2-step verification, regardless of the personal preference.

Enjoy the new improved security feature! 🙂

Form Export / Import Tool

Ever need to copy your form from your development server / local computer to your live site? Or need to copy the form from one site to another?

Unfortunately, it wasn’t possible to do so 🙁 Well, at least there wasn’t any easy way to do that.

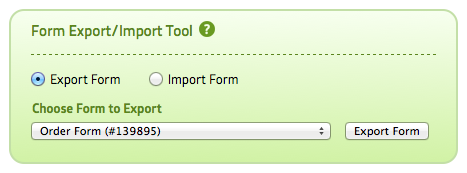
As of version 4.2, we’ve added a new feature to let you export your form into a file (*.json file). You can then easily import the file into another instance of MachForm! Yay! 🙂

This is a small utility but VERY useful and requested by many people.

To use this tool, simply login to your MachForm and go to Settings page. You’ll find the Export/Import Tool at the bottom of the page.

When you import a form, all form fields and settings (including logics, payments, emails, etc) will be copied and the form will get new id number. The only exceptions are the theme and entries data, the tool won’t import them.

Conditional Logic for Webhook

Previously, on version 4.0 we’ve introduced Webhook functionality to let you send your form data to another websites for further processing.

This new Webhook functionality lets you integrate your form with many other websites, such as MailChimp, CampaignMonitor, Aweber, LightBlue, Tave, Highrise and many others!

However, each form was limited to a maximum one webhook only.

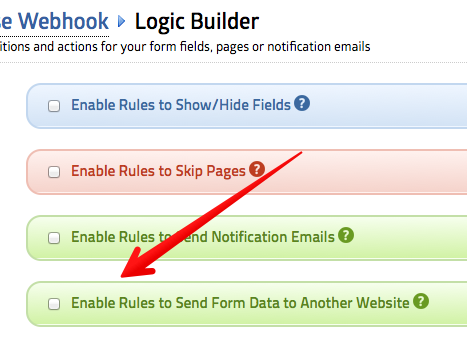
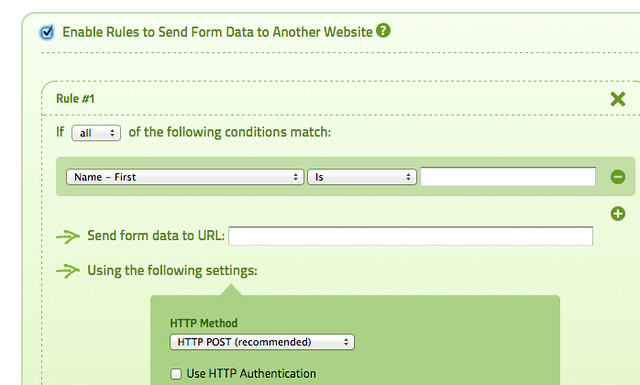
Fear not, as of v4.2 you’ll be able to configure unlimited webhooks for each form AND you’ll be able to use conditional logic to send the webhook as well! 🙂

Using this new feature, you’ll be able to do the following tasks easily:

[listarrow]

  • Send form data to different websites/URLs based on user choices
  • Send webhook with different content based on user choices
  • Send one form data to multiple websites all at once
  • Only send webhook when certain conditions being met
  • etc

[/listarrow]

The possibilities are endless, since you will be able to add as many rules as you need and customize the whole aspect of the webhook using as many conditions you can think of 🙂

Simple Setup

There is nothing really new to learn about, we’ve made the interface to be similar enough as the field/page/email logic builder. So you’ll be familiar already.

Simply create the conditions, set the webhook URL and parameters and you are all set.

Availability

This functionality is available within v4.2 and is a FREE update for all v4 owners!

Light Blue Integration

Many of MachForm users are professional photographers and many are using Light Blue (a very popular studio manager software in the UK) to streamline their business.

Recently, Light Blue released a new HTTP API to let you send any data to your Light Blue account. This means that you’ll be able to link your forms to your Light Blue account seamlessly. Yay!

You’ll be able to:
[listarrow]

  • Create a new contact on your Light Blue using your form data
  • Create a new shoot record on your Light Blue using your form data

[/listarrow]

Find your Light Blue API Key

The first thing you need to do before proceeding with the integration is to generate/find your Light Blue API Key.

Login to Light Blue website, click My Account and then copy your existing API Key or click the create key button.

Your Light Blue API Key should be something like this:
7a40a241eacd035d442ca7299cvgba12

Linking your forms to the Light Blue API

Let say you have a simple form that collect your client info and ask for shoot date:

and you would like to send all the data collected there to your Light Blue account.

Simply go to your MachForm panel and click Notifications menu.

Click Send Form Data to Another Website option and then enter this URL into the Website URL:

https://online.lightbluesoftware.com/api.php

Leave other settings to use the current settings, like this:

At this point, you are halfway through. Your form now knows how to link to your Light Blue account.

Define Parameters

The next thing to do, you need to associate the fields in your forms with parameters that the Light Blue API recognizes.

To do this, you need to set the Parameter Name for each field on your forms, like this:

As you can see above, the Parameters section contain two columns (Name and Value). The first column (Name) is the record name within your Light Blue account, while the second column (Value) is the template variable name of your form fields that being sent to Light Blue.

Write all those Name records, exactly as shown above (Key, Type, ContactNameFull, etc).

While the record on the second columns (Value), you’ll need to replace them with your own form fields template variables and API key. Replace the value of the Key with your own API key, while the value of Type should always use “contact form“.

The rest of the values ({element_1}, {element_2}, etc) should be replaced with your form fields template variables.

To get the template variables of your fields, click the template variables link at the bottom of the page.

Shoot Date

Amongst those parameters, you’ll notice that the template variables for the ShootDate is different. The ShootDate is basically the session date and by default Light Blue accept the date using dd/mm/yyyy format.

To send the date using the above format, you’ll need to get the template variable for the date field on your form, particularly for each date parts. And then merge those template variables using slash characters, like this:

{element_5_dd}/{element_5_mm}/{element_5_yyyy}

and that’s it! Save those settings and test submitting your form. Once your Light Blue software being synched, you should see the data in the Inbox:

Parameters List

To make it easier for you, below is the parameters being used within the example previously. Simply copy and paste the parameters name.

[listarrow]

  • Key
  • Type
  • ContactNameFull
  • Message
  • ContactEmail
  • ContactPhoneHome
  • ShootDate

[/listarrow]

The only required parameters are Key and Type, others are optional. So let say you only need to collect your client name and email, without the need to get the shooting date, then you’ll only need to use Key, Type, ContactNameFull and ContactEmail.

The full list of supported parameters is available directly on Light Blue API documentation page.

If you need any help with the above, please feel free to contact us! We’ll help you 🙂

MachForm 4.1 Released

MachForm version 4.1 is now available for downloads on Members Area.

This is a maintenance release to address Yahoo/AOL DMARC issue that might affect your form’s email deliveries. It contain bugfixes and several minor improvements.

What’s DMARC?

About three weeks ago, Yahoo began imposing a stricter email validation policy (DMARC) that unfortunately breaks lot of things in the internet.

Last week, AOL started to implement the same policy and the issue become more widespread.

These are major changes that affect lots people and most likely other email providers such as Gmail or Hotmail will do the same policy, sooner or later.

How is MachForm affected?

If your forms are configured to use the “From Email Address” using the email address entered by people who filled the form, then you are affected by this issue. Notification emails won’t be sent if people are using Yahoo or AOL address.

If your forms are using the email from your own domain for the “From Email Address”, then you are not affected. Notification emails should work properly and it’s not necessarily needed to update (it’s better to update to 4.1 though).

How MachForm address this issue?

As of MachForm 4.1, we added new option to let you define “Reply-To Email” address for your forms. This new functionality lets your form to work properly as usual and avoid the DMARC issue. This is also the recommended method suggested by Yahoo/AOL.

Changelog

[listarrow]

  • Added new functionality to configure Reply-To address for all forms
  • Added Payment URL on entry page for unpaid entries. So that PayPal users could resume payment
  • Added Simplified Chinese language translation (credit to Ho Bernie)
  • Added SSL support for web server behind load balancer
  • Default From Name and Email on Settings page are now being used for all form notifications
  • Bugfix: Unable to connect to secure SMTP server using port 465, must be using port 587
  • Bugfix: The default mail function (non SMTP) may not working properly on some host, such as BlueHost
  • Bugfix: Uploading images on the theme editor when using HTTPS is not working properly
  • Bugfix: Icon fonts doesn’t appear correctly on some server
  • Bugfix: Website validation not working properly
  • Bugfix: When duplicating a form, the report is not being duplicated correctly
  • Bugfix: Incorrect total percentage calculation on some charts
  • Bugfix: Unable to check CVV code properly on Authorize.net
  • Bugfix: Deleted dropdown/multiple choice values are still being displayed within the chart
  • Bugfix: Unable to edit an entry that has required field and the field was hidden due to skip-page logic
  • Bugfix: Custom redirect URL doesn’t work when using PayPal and coupon code enabled

[/listarrow]

How to Update

This update is FREE for all V4 owners.
As mentioned above, you can download it on Members Area.

If you are currently using v4.x or v3.x, follow this upgrade instruction:
Upgrading MachForm 3.x/4.x to 4.1

If you are still using v2.x, follow this upgrade instruction:
Upgrading MachForm 2.x to 4.1

MailChimp Integration

One of the new feature within version 4 is the ability to send your form data to another website. In this article, we’ll show you how to integrate your form with MailChimp.

Basically, using this new webhook feature, you’ll be able to call any MailChimp API to do the tasks you need.

Some common integrations are:
[listarrow]

  • Add a new subscriber to a list of your choosing
  • Unsubscribe an email address from a list of your choosing
  • Edit the email address, merge fields, and interest groups for a list member
  • Create a new draft campaign to send
  • Delete a campaign

[/listarrow]

Find your MailChimp API Key

The first thing you need to do before proceeding with the integration is to generate/find your MailChimp API Key.

Login to your MailChimp panel, click Profile ⇢ Account Settings ⇢ Extras ⇢ API Keys and then copy your existing API Key or click the Create a Key button.

More detailed instruction (video) also available on MailChimp help page.

Your MailChimp API Key should be something like this:
1644b44d50bcc02f6f789aaf324f82ec-us4

Find your MailChimp URL (API Endpoint)

The next thing you need is your MailChimp URL (API Endpoint). MachForm will be using this URL to submit your form data to your MailChimp account.

The generic format for your MailChimp URL is like this:

https://XXX.api.mailchimp.com/2.0/

where XXX should be replaced with the portion after the dash in your API Key. e.g. “us1”, “us2”, “uk1”, etc. A solid example – say your API Key is 1644b44d50bcc02f6f789aaf324f82ec-us4.

Then your MailChimp URL would be:

https://us4.api.mailchimp.com/2.0/

We’ll be using the above URL as the base part of any other URLs, since each task will have its own specific URL.

Add a new subscriber to a list of your choosing

Let say you have a simple form with only one email field:

and you would like to add the email address entered by your users into your MailChimp list named Subscriber List.

Simply go to your MachForm panel and click Notifications menu.

Click Send Form Data to Another Website option and then enter this URL into the Website URL:

https://us4.api.mailchimp.com/2.0/lists/subscribe

Note that the URL above is basically using your MailChimp URL, with the addition of lists/subscribe at the end of it. Make sure to use your own MailChimp URL.

Check the Use Custom HTTP Headers and paste this code:

{
"Content-Type": "application/json",
"User-Agent": "MachForm Webhook v4.0"
}

like this:

Then select Send Raw Data and paste this code:

{
"apikey": "1644b44d50bcc02f6f789aaf324f82ec-us4",
"id": "7bab35f1af",
"email": {
"email": "{element_2}"
},
"double_optin": false,
"update_existing": true,
"replace_interests": true,
"send_welcome": true
}

like this:

Note that the code above need to be adjusted with your own API Key, List ID and the template variable of your email field.

To get the template variable of your email field, simply click the template variable link at the bottom of the page:

To get your List ID, go to your MailChimp account, click Lists and select the list name you would like the form to send the data into. Click Settings ⇢ List Name and Defaults and you’ll find your List ID:

and that’s it. Save the settings and test by submitting your form. The email address will be automatically added to the list you choose on your MailChimp account.

Unsubscribe an email address from a list of your choosing

Creating unsubscribe form is pretty much the same as the subscribe form above (#1). The only thing different are the Website URL and the Raw Data.

You should use this URL to unsubscribe:
https://us4.api.mailchimp.com/2.0/lists/unsubscribe

Note that the URL above is basically using your MailChimp URL, with the addition of lists/subscribe at the end of it. Make sure to use your own MailChimp URL.

Check the Use Custom HTTP Headers and paste this code:

{
"Content-Type": "application/json",
"User-Agent": "MachForm Webhook v4.0"
}

like this:

Then select Send Raw Data and paste this code:

{
"apikey": "1644b44d50bcc02f6f789aaf324f82ec-us4",
"id": "7bab35f1af",
"email": {
"email": "{element_1}"
},
"delete_member": false,
"send_goodbye": false,
"send_notify": true
}

like this:

Note that the code above need to be adjusted with your own API Key, List ID and the template variable of your email field.

Other possible integrations

There are lots other thing you can do with your form and MailChimp. You might want to take a look into MailChimp API Documentation page.

Find the method you would like to implement and paste the code into the Raw Data section as above. Enjoy!

The new MachForm 4 is now available!

Howdy! We’re very excited to announce the immediate availability of the new MachForm 4!

This release is a huge improvement over previous version which made MachForm even more powerful and fun.

Here’s what’s new in MachForm 4

[gs_4a]

Report Builder

Easily create graphical charts!
Pie, Donut, Bars, Line, Area and Grid.

[/gs_4a]

[gs_4z]

Authorize.net Integration

Accept credit card payment on your forms.
Charge one-time or recurring payments.

[/gs_4z]
[gs_4a]

Webhook Integration

Send form data to another website.
Works with CampaignMonitor, MailChimp, etc.

[/gs_4a][gs_4z]

Discount Code

Allows your clients to enter coupon code
and receive discount (fixed/percentage).

[/gs_4z]

[hr]

[listarrow]

[/listarrow]

Bugfixes and Improvements

[listarrow]

  • Updated Admin Panel to support retina display
  • Added more currencies to Stripe integration
  • Paragraph on view entry page will be displayed using single column
  • Display subscription ID as payment ID on Stripe’s recurring payment
  • Bugfix: Using quotes for keyword on logics is causing error
  • Bugfix: Stripe payment page didn’t work on IE8 or older
  • Bugfix: Duplicating a form doesn’t copy the whole email logic conditions
  • Bugfix: Deleting a form doesn’t remove the email logic conditions records
  • Bugfix: Leading zero issue when using Time field for conditional logic
  • Bugfix: PHP sessions doesn’t work under Safari browsers when the form is being embedded from different domain
  • Bugfix: Form logo aren’t being resized properly on mobile view
  • Bugfix: Gross amount missmatch bug on some occasions within PayPal IPN script
  • Bugfix: A field with ‘admin only’ and ‘required’ enabled is causing validation error when the admin logged in and submit the form
  • Bugfix: On european date field, setting empty min-Date is causing trouble (missing date value) when editing the entry
  • Bugfix: Sales tax on Stripe is causing some error
  • Bugfix: Multiple uploaded files on some PHP version (PHP 5.3) doesn’t have proper ‘br’ tags within the email
  • Bugfix: Form limit submission rule make it impossible to edit entry on admin panel
  • Bugfix: HTML tags are double encoded on email logic settings page
  • Bugfix: Template variable for Signature field is being overridden by {entry_data}
  • Bugfix: Issue with conditional logic to show/hide fields when the rule consist of fields from multiple pages
  • Bugfix: Editing entries that has date field with rules (disabled past dates) is causing error
  • Bugfix: Hidden fields due to conditional logic shouldn’t be included within price calculation
  • Bugfix: When payment fields being used as part of entries filter and the payment fields aren’t set as preference, the entries are broken/can’t be displayed
  • Bugfix: The resume option is having some session issue when the user is using the browser back button after saving the form
  • Bugfix: Updated switfmailer library to support STARTTLS
  • Bugfix: Skip page logic doesn’t work properly
  • Bugfix: On recurring payments with trial price under Stripe, the recurring price is the one being displayed within the email instead of the trial price
  • Bugfix: : Trial Period on Stripe is incorrectly using the interval of the main subscription
  • Bugfix: UTF-8 encoding issue with the email subject on the resume email
  • Bugfix: Non-required matrix field that was hidden due to logic and then being displayed and left empty, it will be incorrectly marked as ‘required’
  • Bugfix: Email validation doesn’t accept quote character
  • Bugfix: Payment field selected as sort preference on entries manager causing query error
  • Bugfix: Trailing zero on review page’s payment total is not being displayed
  • Bugfix: Added ob_clean() on download.php and export script to discard any new lines from config.php file
  • Bugfix: Uploading multiple files using the same file names all at once within a session won’t work
  • Bugfix: Hidden section break due to logic shouldn’t be displayed within the review and email
  • Bugfix: Domain/email validation couldn’t handle long TLD
  • Bugfix: Declined cards error messages wasn’t being handled properly on Stripe’s payment page

[/listarrow]

How to Upgrade

This is a major version release and you will be able to upgrade your existing license at the following prices:

Standard
Professional
Unlimited
$39
$69
$165


Click here to upgrade
.

For those who purchased any license within 2014, this upgrade is free of charge and you can download the upgrade from our Member Area. Simply login there to get the update and your license key.

Thanks for your support!

A huge “THANK YOU” to all of you, our awesome MachForm users and beta testers for helping us define and test this release, we couldn’t have done it without you!

Page 4 of 7« First...23456...Last »